A demo post to show how to use WordPress crop functionality when adding a Featured Image.
Note that the image needs to be sufficiently sized to start with, and we will be using this image

First I click to add my featured image, I upload the image I want to use, and then I click on “Edit Image”
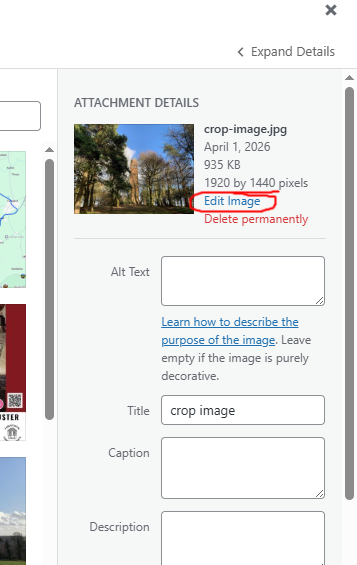
This opens up the image editor where I select crop, and have two option, either crop Aspect ratio which would be 2:1, or crop using “Selection” and use 800×400.
Crop Aspect Ratio

Crop Selection
When using the “Crop Selection” option, you need to define the coordinates of where the crop is in the image.
In this example I have started my crop 400 pixels down and 400 pixels in from the top left corner.

In both cases, once I have defined my crop I then click the “Apply Crop” blue button, “Save Edits” above Crop Image options, and then set Featured Image button on the lower right of the window.
